
Sending emails from these AI-generated apps, however, requires a reliable email infrastructure that matches the speed of modern development workflows.
That’s where Mailtrap comes in. Combining Bolt.new’s rapid prototyping with Mailtrap’s email delivery infrastructure lets you set up user-triggered email sending in a fraction of the time. Whether you’re building a SaaS landing page or an e-commerce platform, this integration streamlines the entire email workflow.
In this tutorial, you’ll learn how to integrate Mailtrap with Bolt.new step by step, enabling you to send welcome emails, order confirmations, and other user-triggered messages with high deliverability rates.
Table of Contents
Table of Contents
How Bolt.new and Mailtrap Work Together
Bolt.new is an AI-powered app builder that transforms prompts into production-ready, full-stack applications. You describe what you want, for example, a contact form with email notifications, and Bolt generates the frontend, backend, and database structure automatically.
Mailtrap, on the other hand, is an email delivery platform designed for developers and product teams. It provides both Email API and SMTP solutions focused on fast delivery and high inbox placement rates. When you integrate Mailtrap with your Bolt.new application, you gain access to real-time analytics, deliverability monitoring, and a reliable infrastructure that ensures your user-triggered emails actually reach your users’ inboxes.
The core benefits of this integration include:
● High deliverability: Mailtrap is optimized for inbox placement and reduces the chances of your emails landing in spam folders.
● Real-time analytics: Track opens, clicks, and other important statistics through Mailtrap’s helicopter-view and drop-down dashboards.
● Simple integration: The Mailtrap Node.js SDK works directly within Bolt.new’s generated code and requires minimal configuration.
● Contact management: Automatically sync form submissions to Mailtrap Contacts for future campaigns and automations.
Use Case 1. Sending Basic Transactional Emails
The most common use case is sending transactional emails, which are triggered by user actions. These include welcome emails when someone signs up, password reset confirmations, order confirmations for e-commerce platforms, and notification emails when a form is submitted. With Bolt.new generating the application logic and Mailtrap handling the email delivery, you can have this functionality running within minutes rather than hours.
Use Case 2. Capturing Leads and Syncing Contacts
Beyond simple email sending, you can configure Bolt.new to capture lead information through forms and automatically create contacts in Mailtrap. This enables you to build email lists, segment recipients, and run targeted email campaigns. Each form submission can store the contact’s name, email, and custom fields directly in Mailtrap Contacts while simultaneously saving the data to your Supabase database.
How to Integrate Mailtrap with Bolt.new
Prerequisites and requirements
Before starting the integration, make sure you have the following:
● A Bolt.new account
● A Mailtrap account
● A Supabase account (Bolt.new uses Supabase for secure storage of API keys and environment variables)
Step 1. Configure Your Mailtrap Account
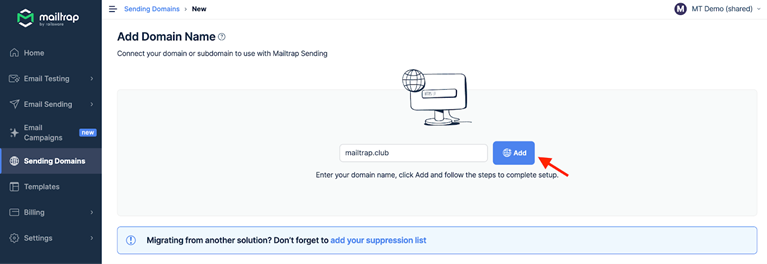
Start by logging into your Mailtrap account and navigating to the Sending Domains section. Then, add your sending domain and complete the DNS verification process by adding the required TXT and CNAME records provided by Mailtrap to your domain’s DNS settings. Follow this guide to set up domain verification.
Once your domain is verified, go to Settings → API Tokens and create a new API token. Make sure the token has admin access level, which grants permissions for both email sending and contact management. Also, make sure to copy this token and store it safely since you’ll need it in the next step.
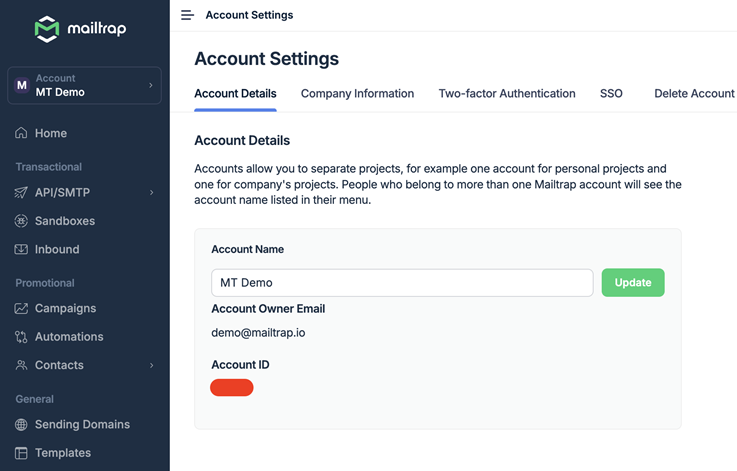
Next, note your Account ID, which you can find under Settings → Account Settings.
Tip: If you plan to add form submissions to specific contact lists, locate your List ID by navigating to Contacts, clicking on a list, and extracting the ID from the URL.
Step 2. Set Up Environment Variables in Bolt.New
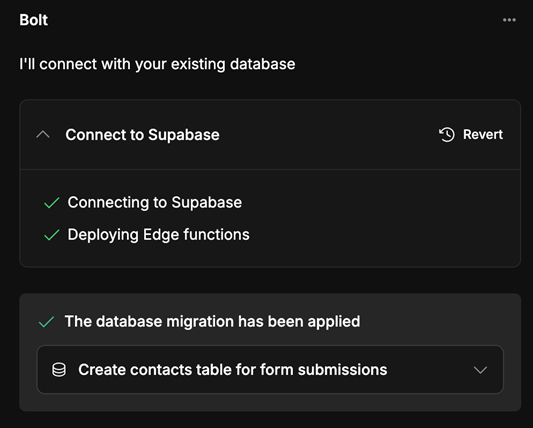
In Bolt.new, click the Integrations button at the top right and select Supabase. Follow the wizard to connect your Supabase project. This integration is important because Bolt.new stores environment variables securely in Supabase rather than exposing them in your code.
Once connected, add the following environment variables to your Supabase project’s secrets:
● MAILTRAP_API_KEY: Your Mailtrap API token
● MAILTRAP_ACCOUNT_ID: Your Mailtrap Account ID
● MAILTRAP_MY_EMAIL: The email address where you want to receive notifications
● MAILTRAP_FROM_EMAIL: Your verified sending address (e.g., hello@yourdomain.com)
This bypasses Supabase’s hourly email sending limits and routes all emails through Mailtrap’s infrastructure.
Step 3. Implement Email Sending in Your Bolt.New Project
Create a new project and use a prompt that includes your email-sending requirements. Here’s an example prompt:
| Create a landing page with a contact form that collects name, email, and message. When the form is submitted, send an email notification to [your-email] via Mailtrap. Use the Mailtrap Node.js SDK from https://www.npmjs.com/package/mailtrap. Store the MAILTRAP_API_KEY in Supabase secrets. My verified sending domain is [your-domain.com], and emails should be sent from [contact@your-domain.com]. |
Bolt.new will generate the necessary code, including the edge function that handles email sending. The generated code will use the Mailtrap Node.js SDK to send emails through the Email API, pulling credentials from your Supabase environment variables.
If you also want to create contacts in Mailtrap with each form submission, extend your prompt to include instructions like:
| Create a contact in Mailtrap with the submitted name and email, and save the Mailtrap contact ID to the Supabase database. |
Step 4. Test Your Email Integration
After Bolt.new generates your application, use the Preview feature, fill out the contact form with test data, and submit it. If everything is configured correctly, you should receive an email notification at your specified address within seconds.
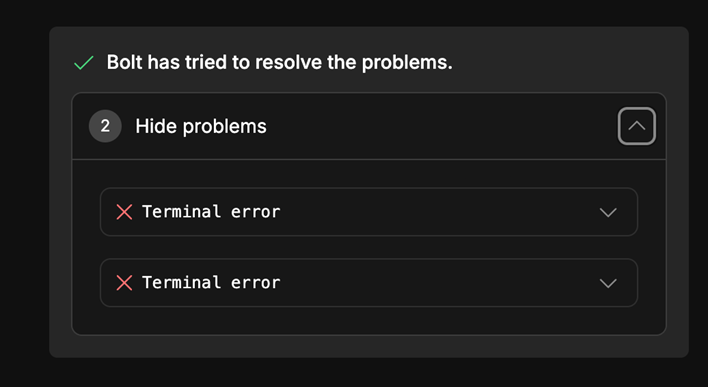
If you encounter errors, check the Supabase Edge Functions logs, copy/paste any error messages into Bolt.new, and the AI will attempt to debug and fix the issues automatically.
Best Practices for Bolt.New Email Integration
Security
Never hardcode API keys or credentials in your application code, and always use environment variables stored in Supabase Secrets. So, when prompting Bolt.new, explicitly mention that sensitive information should be stored as secrets, not in the codebase.
Deliverability
Monitor your sender reputation through Mailtrap’s analytics dashboard and address any deliverability issues promptly.
Moreover, use the Transactional Stream for automated, user-triggered emails and the Bulk Stream for marketing campaigns. This separation helps maintain your sender reputation and ensures your transactional emails aren’t affected by bulk sending patterns.
Error Handling
Include comprehensive error handling in your Bolt.new prompts since email can fail for various reasons: network issues, invalid email addresses, or rate limits. So, make sure your application provides appropriate feedback to users and logs errors for debugging.
Wrapping Up
With AI generating your application code and Mailtrap handling email infrastructure, you can focus on what matters most: creating value for your users.
The integration process is straightforward: set up your Mailtrap account with a verified domain, connect Bolt.new to Supabase for secure credential storage, and use detailed prompts to generate your email-sending functionality.
Within minutes, you can have a working application that sends user-triggered emails with high deliverability rates. Happy sending!