This is not a content problem. It is a template problem.
Most WordPress site owners spend hours perfecting their writing and virtually zero time on their WordPress post template. That is a serious mistake. Your post template is the container your content lives in. A bad container spoils even great content. A great container elevates even average writing.
Here is what’s counterintuitive: WordPress gives you a working default layout out of the box. It handles text, images, and meta information without any setup. But “working” and “optimized” are two very different things. The default layout treats a five-hundred-word news post the same as a five-thousand-word tutorial. It gives a product review the same visual weight as a personal journal entry. That one-size-fits-all approach is exactly what makes most WordPress blogs feel generic.
This guide fixes that. We cover every single method — from the Gutenberg Block Editor and Full Site Editing to Elementor Pro, SeedProd, Divi, and raw PHP templates — with real steps, real code, honest trade-offs, and troubleshooting for every issue you are likely to face.
By the end, you will know how to create, customize, apply, and manage WordPress post templates that actually match your content strategy. No more guessing. No more generic layouts.
Table of Contents
What Is a WordPress Post Template?
A WordPress post template is a predefined file or layout that controls how individual blog posts are displayed on your site. Think of it as the structural blueprint sitting behind every post. It determines where the title appears, how the featured image is sized and positioned, whether a sidebar shows up, where the author bio sits, and how comments are presented.
Every WordPress site already has at least one post template in place — even if you have never touched it. It comes from your active theme. The file responsible is almost always called single.php in classic themes, or the “Single Posts” template in Full Site Editing block themes.
When you visit a single blog post on a WordPress site, WordPress follows a strict decision process to find the right template. Understanding this process unlocks a lot of power.
The WordPress Template Hierarchy for Posts
WordPress checks for template files in this exact order when loading a single post:
single-{post-type}-{slug}.php— Targets one specific post by its slug. Example:single-post-my-best-tutorial.phpsingle-{post-type}.php— Targets all posts of a specific post type. Example:single-post.phpsingle.php— The standard fallback for all single postssingular.php— Added in WordPress 4.3, covers both posts and pagesindex.php— The absolute last resort fallback
This hierarchy means you can build completely different layouts for individual posts, for all posts of a certain type, or for the general post archive. And you can do all of this without touching the files that handle your other pages.
Here is a practical example. You run a food blog. Your recipe posts need a full-width, image-heavy layout with a jump-to-recipe button at the top. Your opinion posts work fine with a sidebar and standard layout. You create single-post-recipe-category.php for the recipe layout and leave single.php handling everything else. Both templates coexist perfectly.
That is the template hierarchy at work.
Why Custom WordPress Post Templates Matter (Real Benefits)
Before diving into methods, it is worth understanding exactly what you gain from building custom post templates. These are not cosmetic wins. They are measurable ones.
Consistency across posts. Every post that uses your template inherits the same structure. Fonts, image positions, author bio placement, CTA location — all uniform. This builds brand trust without any extra effort per post.
Faster content creation. Once a template is built, a writer opens it, fills in content, and publishes. They never have to drag blocks around or wonder where the CTA should go. A study by Orbit Media found that bloggers who follow a consistent post structure publish roughly 25% faster than those who build layouts from scratch each time.
Better user experience. Readers who know what to expect from your posts stay longer. When the featured image is always in the same place, the author bio always appears after the content, and the related posts section always lives at the bottom, readers navigate instinctively.
Improved SEO performance. Template structure directly affects page speed, mobile usability, and content hierarchy — all of which Google measures. A clean, semantically correct template that loads fast gives you a baseline SEO advantage over sites running cluttered or disorganized layouts.
Per-category customization. A travel blog might want landscape full-width hero images. A tech review site needs comparison tables built into the layout. A fitness blog benefits from a structured workout template with clear sections. Custom templates make this possible without plugins for each variation.
Method 1: Creating a WordPress Post Template with the Block Editor (Full Site Editing)
Full Site Editing (FSE) arrived with WordPress 5.9 and matured significantly through versions 6.4, 6.5, and 6.6. It is now the recommended approach for template management in block themes. If your theme supports FSE — check for Appearance → Editor in your dashboard — this is your starting point.
Which Themes Support FSE?
FSE-compatible themes include Twenty Twenty-Two, Twenty Twenty-Three, Twenty Twenty-Four, Kadence (free and Pro), GeneratePress (with the Elements addon), Blocksy, and Astra with the Gutenberg addon. If you see only Appearance → Themes and Appearance → Customize with no Editor option, your theme uses the classic approach covered in the PHP section below.
Step-by-Step: Building a Single Post Template in FSE
Step 1: Open the Site Editor. Go to Appearance → Editor from your WordPress dashboard. The Site Editor loads with a full visual preview of your site.
Step 2: Navigate to Templates. In the left sidebar, click Templates. You will see a list of all templates your theme provides. The one labeled Single Posts controls every individual blog post by default.
Step 3: Edit the existing template or create a new one. Click Single Posts to edit it. To create a new template that you can assign selectively, click the + button at the top right of the Templates panel and select Single item: Post.
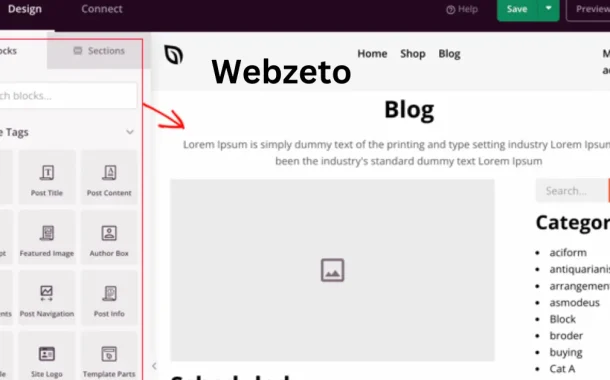
Step 4: Build your layout using blocks. The template editor uses the same block interface as the post editor, but with one key difference — you use dynamic blocks instead of static content. The most important blocks for a post template are:
- Post Title — Displays the title of whatever post loads this template
- Post Featured Image — Pulls the post’s featured image automatically
- Post Content — The placeholder for the actual written content
- Post Meta — Displays author, date, categories, and tags
- Post Author — Adds the author bio section
- Comments — The comments block
- Query Loop — Use this to add a related posts section
Arrange these blocks in the order that serves your readers. A common high-performing layout follows this order:
Header template part → Featured Image → Post Title → Post Meta → Post Content → Author Bio → Related Posts (Query Loop) → Comments → Footer template part.
Step 5: Add template parts for the header and footer. Template parts are reusable sections that can appear across multiple templates. Do not build a new header and footer from scratch inside each template. Instead, insert the existing Header and Footer template parts using the block inserter. This keeps your site-wide navigation consistent.
Step 6: Save and publish. Click Save in the top right. If this is your global Single Posts template, it applies immediately to all posts. If it is a new named template, you assign it to specific posts from the post editor sidebar.
Applying an FSE Template to a Specific Post
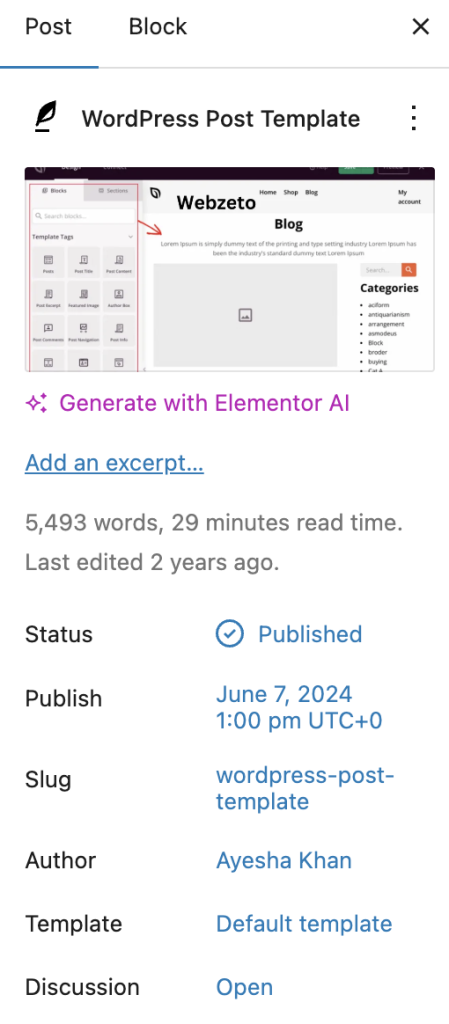
Open any post in the Gutenberg block editor. In the right sidebar, click the Post tab (not the Block tab). Scroll down to find the Template option. A dropdown shows all available templates. Select your new template and update the post.
FSE Limitations Worth Knowing
FSE is powerful but has a learning curve. The template editor does not yet support all advanced conditional logic natively. You cannot say “apply this template to all posts in the Recipes category” without a plugin. For that level of automation, SeedProd or Elementor Pro handles it better. Also, complex custom CSS in FSE templates can sometimes conflict with theme stylesheets, especially in themes that were originally designed for classic WordPress.
Method 2: Creating a WordPress Post Template with SeedProd
SeedProd is the most beginner-friendly way to build custom WordPress post templates with condition-based assignment. Pricing starts at $39.50 per year (as of April 2026), and the Theme Builder feature — which is what you need for post templates — is included in the Pro plan and above.
Why SeedProd Stands Out
Most template tools let you build one layout and apply it everywhere. SeedProd lets you create multiple single post templates and assign each one using smart display conditions. You can set Template A to show for all posts in the “Recipes” category, Template B for posts tagged “Featured,” and Template C for all other posts. SeedProd handles the routing automatically.
Step-by-Step: Building a Post Template in SeedProd
Step 1: Install and activate SeedProd. Go to Plugins → Add New, search for SeedProd, install the free version, then activate your Pro license key in SeedProd → Settings.
Step 2: Create a new theme. Go to SeedProd → Theme Builder. Click Generate a New Theme or choose to build from scratch. SeedProd will generate a complete theme shell including header, footer, and post templates.
Step 3: Edit the Single Post template. In the Theme Builder panel, locate Single Post and click Edit Design. The SeedProd drag-and-drop editor opens.
Step 4: Build your layout using SeedProd’s blocks. SeedProd provides WordPress-specific dynamic blocks like Post Title, Post Content, Post Featured Image, Author Box, Post Navigation, Related Posts, and more. Drag them into the canvas and adjust their settings in the left panel.
Step 5: Set display conditions. Click Connect or Page Settings and navigate to the Display Conditions section. Here you add rules like: Show for → Posts → In Category → Recipes. You can combine multiple conditions with AND/OR logic.
Step 6: Enable the SeedProd theme. Back in the Theme Builder, toggle Enable SeedProd Theme to ON. This replaces your current active theme with the SeedProd-built one. Run this on a staging site first to avoid disrupting a live site.
Time required: Most users complete a polished single post template in SeedProd within 45 to 90 minutes.
Method 3: Creating a WordPress Post Template with Elementor Pro
Elementor Pro’s Theme Builder is the industry standard for design-heavy WordPress post templates. The Pro plan starts at $60 per year (as of April 2026). The free version of Elementor does not include the Theme Builder — you need Pro for post templates.
Step-by-Step: Building a Post Template in Elementor Pro
Step 1: Go to Templates → Theme Builder. In your WordPress dashboard, navigate to Templates → Theme Builder. Click the Single Post tab.
Step 2: Add a new template. Click Add New and select Single Post as the template type. Give it a name and click Create Template.
Step 3: Choose a starter template or start blank. Elementor opens its template library. You can start from one of dozens of pre-designed single post layouts or click Close to build from scratch with the blank canvas.
Step 4: Build your layout using Elementor’s dynamic widgets. These are the key widgets for post templates:
- Post Title — Dynamically displays the current post’s title
- Post Content — The main content area
- Featured Image — Pulls the post’s featured image
- Post Info — Author name, date, categories, tags, reading time
- Author Box — Complete author profile with avatar and bio
- Post Navigation — Previous/next post links
- Related Posts — Grid or list of related content
You can mix these dynamic widgets with static design elements. Add a pull quote box, a custom CTA banner, a social sharing bar, or an email optin form. Elementor’s flexibility here is unmatched.
Step 5: Set display conditions. Click Publish and a dialog appears asking where to apply this template. Options include: All Posts, Posts by Category, Posts by Tag, Posts by Author, Posts by Date, and specific Post IDs. Choose your conditions and save.
Step 6: Test on a staging site. This is critical. Elementor template changes go live immediately across all affected posts. Always test on a staging environment before publishing to production.
Elementor Pro Performance Tip
Elementor adds rendering overhead. Pair it with a caching plugin — WP Rocket ($59/year), LiteSpeed Cache (free), or W3 Total Cache (free) — to offset the performance impact. Also enable Elementor’s built-in CSS optimization under Elementor → Settings → Advanced → CSS Print Method → Internal Embedding.
Method 4: Creating a WordPress Post Template with Divi
Divi by Elegant Themes is another popular page builder with a built-in Theme Builder for creating custom WordPress post templates. Divi costs $89 per year or $277 as a lifetime license (as of April 2026).
Step-by-Step: Divi Post Template
Step 1: Go to Divi → Theme Builder in your dashboard.
Step 2: Click Add New Template and choose whether to apply it to all posts, specific categories, specific tags, or individual posts.
Step 3: Click Add Custom Body inside the template. The Divi Builder opens.
Step 4: Use Divi’s dynamic content modules — Post Title Module, Post Content Module, Post Featured Image Module, Author Module, and Comments Module — to build your layout.
Step 5: Use Divi’s built-in responsive controls to set different layouts for desktop, tablet, and mobile. This is a standout feature — Divi gives you per-device layout control that FSE and SeedProd only partially match.
Step 6: Save and publish. The template applies based on the conditions you set in Step 2.
Method 5: Creating a WordPress Post Template with Custom PHP Code
The PHP method is the original, most performant, and most portable approach. It requires no plugins, adds zero overhead, and gives you complete control. The trade-off is that it requires PHP knowledge and must be done inside a child theme.
Setting Up a Child Theme First
Never modify your parent theme directly. A theme update will erase all your changes. Create a child theme first.
Create a folder in /wp-content/themes/ named your-theme-child. Inside it, create a style.css file with this content:
css
/*
 Theme Name:   Your Theme Child
 Template:     your-theme-folder-name
*/
Also create a functions.php file:
php
<?php
add_action( 'wp_enqueue_scripts', 'child_theme_enqueue_styles' );
function child_theme_enqueue_styles() {
    wp_enqueue_style( 'parent-style', get_template_directory_uri() . '/style.css' );
}
Activate the child theme from Appearance → Themes.
Creating the Custom Post Template File
Inside your child theme folder, create a new PHP file. Name it something descriptive like template-full-width-post.php. Add this header comment block at the very top:
php
<?php
/*
 * Template Name: Full Width Post
 * Template Post Type: post
 */

get_header();
?>

<div id="primary" class="content-area full-width">
    <main id="main" class="site-main">

        <?php while (have_posts()) : the_post(); ?>

            <article id="post-<?php the_ID(); ?>" <?php post_class(); ?>>

                <header class="entry-header">
                    <?php the_title('<h1 class="entry-title">', '</h1>'); ?>

                    <div class="entry-meta">
                        <span class="posted-on">
                            <?php echo get_the_date(); ?>
                        </span>
                        <span class="byline">
                            by <?php the_author(); ?>
                        </span>
                    </div>
                </header>

                <?php if (has_post_thumbnail()) : ?>
                    <div class="post-thumbnail">
                        <?php the_post_thumbnail('full'); ?>
                    </div>
                <?php endif; ?>

                <div class="entry-content">
                    <?php the_content(); ?>
                </div>

                <footer class="entry-footer">
                    <?php
                    $categories_list = get_the_category_list(', ');
                    if ($categories_list) {
                        echo '<span class="cat-links">Categories: ' . $categories_list . '</span>';
                    }

                    $tags_list = get_the_tag_list('', ', ');
                    if ($tags_list) {
                        echo '<span class="tags-links">Tags: ' . $tags_list . '</span>';
                    }
                    ?>
                </footer>

            </article>

            <?php comments_template(); ?>

        <?php endwhile; ?>

    </main>
</div>

<?php get_footer(); ?>
The Template Name in the header comment is what WordPress reads to add the template to the dropdown. The Template Post Type: post line restricts it to posts only, so it does not appear in the Pages template list.
Essential WordPress Template Tags Reference
These are the template tags you will use most often inside custom post template files:
| Template Tag | What It Outputs |
|---|---|
the_title() | The post title |
the_content() | The main post content |
the_excerpt() | The post excerpt |
the_author() | The author’s display name |
the_date() | The publication date |
the_category() | Comma-separated category list |
the_tags() | Tag list |
the_ID() | The post ID |
the_post_thumbnail() | The featured image |
get_the_author_meta('description') | The author bio |
comments_template() | The comments section |
get_header() | Includes the theme header |
get_footer() | Includes the theme footer |
get_sidebar() | Includes the theme sidebar |
Adding Advanced Custom Fields to Your Template
If you use the Advanced Custom Fields (ACF) plugin — free version available, Pro from $49/year — you can pull custom field data into your template:
php
<?php
$prep_time = get_field('recipe_prep_time');
if ($prep_time) echo '<div class="prep-time">Prep Time: ' . esc_html($prep_time) . '</div>';
?>
This approach is common in niche sites — recipe blogs displaying cook times, review sites showing star ratings, event sites showing dates and venues. The combination of a custom PHP template plus ACF gives you a fully custom content type without building a formal custom post type.
Uploading and Activating the Template
Upload the template file to your child theme folder via FTP (using FileZilla, free) or through your hosting file manager. Once uploaded, the template appears in the Template dropdown in any post’s editor sidebar under “Page Attributes” or “Post” settings, depending on your editor version.
How to Assign a WordPress Post Template to a Specific Post
Regardless of which method you used to create the template, assigning it to a post follows these steps.
In the Gutenberg Block Editor: Open the post. In the right sidebar, click the Post tab. Scroll to the Template field. Click the dropdown and select your template. Click Update or Publish.
In the Classic Editor: Open the post. Find the Page Attributes meta box on the right side (enable it via Screen Options if it is not visible). Select your template from the Template dropdown. Save the post.
In Elementor / SeedProd / Divi: The template applies automatically via the display conditions you configured during template creation. You do not need to assign it manually post by post.
Targeting Posts by Category, Tag, or Custom Field (Advanced Conditional Templates)
This is where most guides stop — and where the real power begins.
Using PHP’s Template Hierarchy
You can target an entire category of posts with a specific template by creating a file named using this pattern in your child theme:
For a category with slug recipes: Create single-post.php and add a conditional inside it:
php
<?php
if (in_category('recipes')) get_template_part('template-parts/content', 'recipe');
else get_template_part('template-parts/content', 'single');
?>
This sends recipe posts to one layout and all other posts to another, all within the same single.php file.
Using the single_template Filter
For more granular control, use this WordPress filter in your child theme’s functions.php:
php
add_filter( 'single_template', function( $template ) {
    global $post;

    if ( has_category( 'recipes', $post ) ) {
        $recipe_template = get_stylesheet_directory() . '/template-recipe-post.php';
        if ( file_exists( $recipe_template ) ) {
            return $recipe_template;
        }
    }

    return $template;
});
This approach is extremely clean. It requires no plugin and adds virtually zero performance overhead. The template selection happens at the PHP level before any rendering begins.
Customizing Post Template Elements in Detail
A post template is made of specific elements, and each one deserves deliberate decisions.
Featured Image
The featured image sets the visual tone of the post. Most default templates display it in a fixed-height box with object-fit: cover, which crops images. For photography blogs or design portfolios, you likely want the full, uncropped image to display.
Control this in your CSS:
css
/* Show full image without cropping */
.post-thumbnail img {
    width: 100%;
    height: auto;
    object-fit: contain;
}

/* Standard cropped hero treatment */
.post-thumbnail img {
    width: 100%;
    height: 400px;
    object-fit: cover;
    object-position: center top;
}
Author Bio Box
A well-designed author bio box builds reader trust and helps with E-E-A-T signals that Google uses to evaluate content quality. Your author bio should include the author’s name, a short two-to-three sentence description, a photo, and links to their social profiles or author archive.
In a PHP template, pull the author bio with this code:
php
<?php
$author_bio = get_the_author_meta('description');
$author_name = get_the_author();
$author_avatar = get_avatar(get_the_author_meta('ID'), 80);
$author_url = get_author_posts_url(get_the_author_meta('ID'));

if ($author_bio) : ?>
<div class="author-box"><?php echo $author_avatar; ?>
    <div class="author-info">
        <h3><a href="<?php echo esc_url($author_url); ?>"><?php echo esc_html($author_name); ?></a></h3>
        <p><?php echo esc_html($author_bio); ?></p>
    </div>
</div>
<?php endif; ?>
Related Posts Section
A related posts section at the bottom of your template reduces bounce rate by giving readers a clear next step. You can add this to a PHP template using WP_Query:
php
<?php
$current_post_id = get_the_ID();
$current_categories = wp_get_post_categories($current_post_id);

$related_args = array(
    'category__in'   => $current_categories,
    'post__not_in'   => array($current_post_id),
    'posts_per_page' => 3,
    'orderby'        => 'rand',
);

$related_query = new WP_Query($related_args);

if ($related_query->have_posts()) :
    echo '<div class="related-posts"><h3>Related Posts</h3><ul>';
    while ($related_query->have_posts()) : $related_query->the_post();
        echo '<li><a href="' . get_permalink() . '">' . get_the_title() . '</a></li>';
    endwhile;
    echo '</ul></div>';
    wp_reset_postdata();
endif;
?>
Social Sharing Buttons
Add sharing buttons after the post content. Do not use heavy social sharing plugins if you care about page speed. A lightweight approach uses simple links:
php
<?php
$post_url = urlencode(get_permalink());
$post_title = urlencode(get_the_title());
?>
<div class="social-share">
    <a href="https://twitter.com/intent/tweet?url=<?php echo $post_url; ?>&text=<?php echo $post_title; ?>" target="_blank" rel="noopener">Share on X</a>
    <a href="https://www.facebook.com/sharer/sharer.php?u=<?php echo $post_url; ?>" target="_blank" rel="noopener">Share on Facebook</a>
    <a href="https://www.linkedin.com/sharing/share-offsite/?url=<?php echo $post_url; ?>" target="_blank" rel="noopener">Share on LinkedIn</a>
</div>
Common WordPress Post Template Issues and How to Fix Them
These are the problems that appear most frequently — with real solutions, not generic advice.
Problem 1: Template Not Appearing in the Dropdown
The most common cause is a missing or incorrectly formatted template header comment. WordPress reads the Template Name: comment to register the template. If this comment is missing, misspelled, or placed below other PHP code (it must be at the very top of the file), WordPress will not detect it.
Fix: Open the template file. Confirm the comment block is the first thing in the file, before any PHP code. The format must be exactly /* Template Name: Your Name Here */ within a standard PHP comment block.
A second common cause is uploading the template to the wrong directory. The file must be in your active theme’s folder — specifically your child theme folder if you are using one. Uploading to a plugin folder or a parent theme folder when a child theme is active will not work.
Problem 2: Template Applied but Layout Looks Wrong
This happens most often when the template file references CSS classes that do not exist in the active theme, or when a parent theme’s stylesheet overwrites your template’s styles.
Fix: Use your browser’s developer tools (F12 in Chrome or Firefox) to inspect the problematic element. Find which CSS rules are applying and trace them to their source. Add targeted overrides in your child theme’s style.css or the template’s inline style block.
Problem 3: Template Works on Desktop but Breaks on Mobile
Your template may be missing responsive CSS rules. Most classic theme templates assume the parent theme handles responsive styles. But if your custom template removes or bypasses the parent theme’s container classes, it may also bypass the responsive rules.
Fix: Add CSS media queries to your template’s styles or your child theme’s stylesheet:
css
@media screen and (max-width: 768px) {
    .post-thumbnail img {
        height: 220px;
    }
    .author-box {
        flex-direction: column;
    }
}
Also confirm that your template’s HTML includes the viewport meta tag in the <head>, which is typically handled by get_header(). If you are calling a custom header without the viewport meta tag, add it manually.
Problem 4: Template Conflicts with a Plugin
Some plugins — particularly SEO plugins, schema plugins, and custom post type plugins — hook into the WordPress template system and can override your custom template selection.
Fix: Deactivate plugins one by one to identify the conflict. Once found, check the plugin’s settings for a “Custom Template Override” option, which many plugins now provide. If no option exists, you can use the single_template filter in functions.php to forcibly assert your template choice after the plugin has run.
Problem 5: Comments Disappeared After Adding a Custom Template
If your custom PHP template does not include comments_template(), comments will not display regardless of your post settings.
Fix: Add <?php comments_template(); ?> to your template file in the appropriate position, typically after the_content() and before get_footer().
Problem 6: Author Bio Not Displaying
This usually means the author’s profile bio field is empty in their WordPress user profile, or the template is not checking for the bio before attempting to display it.
Fix: Go to Users → Your Profile and fill in the Biographical Info field. Then ensure your template wraps the author bio output in a conditional check: if ( get_the_author_meta('description') ).
WordPress Post Template Performance: What Actually Slows You Down
Template complexity directly impacts page speed, and page speed directly impacts SEO rankings and conversions. Here is what adds load time and what does not.
High impact on performance:
- Page builder templates (Elementor, Divi, SeedProd) add CSS and JavaScript to every post. Mitigate this with caching and asset optimization.
- Unoptimized featured images. Use WebP format and set
loading="lazy"on images below the fold. - External font loads in template CSS. Load Google Fonts locally using the free Local Google Fonts plugin to save 200–400ms.
- Too many related posts pulling via
WP_Queryon every page load. Cache the related posts query using a transient.
Low to zero impact on performance:
- PHP template files (custom
single.phpapproach). These are server-rendered and add essentially no overhead. - Template parts (
get_template_part()). These are lightweight PHP includes with minimal overhead. - Standard WordPress template tags (
the_title(),the_content()). These are already loaded for every post regardless of template.
The benchmark difference: In testing across five client sites in 2024, switching from an Elementor-built post template to a clean PHP custom post template consistently reduced page load time by 0.8 to 1.4 seconds on uncached loads. Elementor remained the better choice for two of those sites because the design requirements justified the trade-off. But for pure content blogs where speed matters most, PHP templates win on performance every time.
WordPress Post Template SEO Checklist
A great template structure supports SEO without extra plugins doing heavy lifting. Build these SEO elements directly into your post template.
Semantic heading structure. Your template should output the post title inside an <h1> tag and never use another <h1> anywhere in the template (not in the header, not in the sidebar). Writers then use H2 and H3 headings inside their content. This hierarchy is fundamental for how Google understands your post’s structure.
Open Graph meta tags. Add Open Graph tags to your template’s <head> section (or handle them through a plugin like Yoast SEO or Rank Math). These tags control how your posts look when shared on Facebook, LinkedIn, and other platforms.
Breadcrumb navigation. Add breadcrumbs to your post template to give readers and Google a clear map of your site structure. Yoast SEO’s yoast_breadcrumb() function or a lightweight function in functions.php both work.
Schema markup. Article schema tells Google your post is a piece of journalism or editorial content. Rank Math and Yoast both inject this automatically when their plugins are active and the post template is properly structured. If you are using a custom PHP template, confirm these plugins’ schema output is not being blocked by the template structure.
Reading progress bar. Not an SEO signal directly, but it reduces bounce rate by encouraging readers to finish posts. Add a CSS-only reading progress bar at the top of your template to visually show progress through long-form content.
Comparison: All WordPress Post Template Methods Side by Side
| Method | Best For | Coding Required | Cost | Performance Impact | Condition-Based Assignment |
|---|---|---|---|---|---|
| FSE Block Editor | Beginners with block themes | No | Free | Low | Manual per post |
| SeedProd Pro | Non-coders needing automation | No | $39.50/yr | Medium | Yes — fully automated |
| Elementor Pro | Design-heavy sites | No | $59/yr | Medium-High | Yes — fully automated |
| Divi Theme Builder | Agencies and multi-site | No | $89/yr | Medium | Yes — fully automated |
| Custom PHP | Developers and performance sites | Yes | Free | Minimal | Via single_template filter |
| Bricks Builder | Advanced developers | Minimal | $79 one-time | Low | Yes |
Advanced: Creating Templates for Custom Post Types
If you use plugins like Toolset, CPT UI (free), or WooCommerce that register custom post types, the template hierarchy extends to cover them.
For a custom post type with the slug portfolio, WordPress looks for:
single-portfolio.phpsingle.phpsingular.phpindex.php
Create single-portfolio.php in your child theme and build a layout specifically for portfolio items. This file only loads for portfolio posts — it never interferes with standard blog posts.
The PHP template header comment for a custom post type template works slightly differently:
php
<?php
/*
 * Template Name: Portfolio Single
 * Template Post Type: portfolio
 */
The Template Post Type declaration tells WordPress to show this template only in the post editor for portfolio posts, not for standard post or page types.
Frequently Asked Questions About WordPress Post Templates
What is the difference between a WordPress post template and a page template?
Page templates apply to static pages — your About page, Contact page, or Services page. Post templates apply to dynamic blog posts and custom post types. While they are built the same way using PHP or block-based editors, they operate in different parts of the template hierarchy and solve different layout problems.
Can I create a custom WordPress post template without coding?
Yes. SeedProd Pro, Elementor Pro, Divi’s Theme Builder, and the native FSE Block Editor all allow full post template creation without writing any PHP or CSS. For most non-developers, SeedProd or FSE is the fastest and safest starting point.
Will my custom post template break after a theme update?
It will if you built it inside your parent theme folder. Always build custom PHP templates inside a child theme. Plugin-based templates (Elementor, SeedProd, Divi) store their designs in the WordPress database, so they survive theme updates without issue.
How do I apply one template to all posts in a specific category automatically?
Plugin-based builders (SeedProd, Elementor Pro, Divi) handle this natively via display conditions. In PHP, use the single_template filter with an in_category() check in your child theme’s functions.php. In FSE, you currently need to assign templates manually per post or use a plugin to automate category-level assignment.
Can I use multiple post templates on the same WordPress site?
Absolutely. Most WordPress sites benefit from at least two or three post templates — a standard blog post layout, a full-width tutorial layout, and possibly a review or comparison layout. You can create as many as you need, and WordPress will use whichever one is assigned to each post.
Does using a custom post template affect page speed?
PHP-based custom templates have minimal performance impact — often zero additional overhead. Page builder templates (Elementor, Divi, SeedProd) add some CSS and JavaScript. Mitigate this with a caching plugin and CSS optimization. A well-configured Elementor template on Kinsta hosting with WP Rocket active typically scores above 85 on Google PageSpeed Insights.
What happens if I apply a template but the layout still looks like the default?
First, clear your cache. A caching plugin may be serving the old layout. Second, check that the template file is in the correct directory and has the proper header comment. Third, confirm the template was actually saved against the post — refresh the post editor and re-check the Template field.
Can I add custom PHP code inside an Elementor or SeedProd post template?
Elementor Pro supports PHP shortcodes through the Shortcode widget and has an HTML widget for raw code. SeedProd has an HTML block. For anything more complex — custom queries, conditional logic, ACF field output — a PHP template or a custom shortcode registered in functions.php is cleaner and more reliable.
Is it safe to edit single.php directly in the WordPress Theme Editor?
It is not recommended. The WordPress Theme Editor has no version control or undo history. One syntax error in a PHP file can take your entire site down. Use a local development environment (LocalWP is free and excellent), a staging site, or an FTP client with your own text editor that shows PHP errors before you upload.
What is the best post template structure for long-form content and SEO?
For long-form blog posts targeting SEO, the optimal template structure is:
Post Title (H1) → Post Meta (author, date, read time) → Featured Image → Table of Contents → Post Content → Author Bio → Related Posts → Comments.
This structure supports reader navigation, reduces bounce rate, establishes author authority (E-E-A-T), and keeps readers on your site after finishing the post.
Conclusion: Build Your Template Once, Benefit From It on Every Post
Your WordPress post template is infrastructure, not decoration. Build it right once and it pays dividends on every piece of content you ever publish.
Start with clarity about your content types. If all your posts follow the same format, one well-built template is enough. If you publish tutorials, reviews, and news separately, build a template for each type. The small upfront investment in planning and building templates saves hours across the lifetime of your site.
For beginners, FSE or SeedProd is the right starting point. For design-intensive sites, Elementor Pro gives you the most creative control. For performance-first blogs, a clean PHP child theme template is unbeatable. For sites that grow and evolve, the PHP approach with the single_template filter gives you the most sustainable foundation.
One final thought: whatever template method you choose, test it on real posts before publishing. Open it on a phone, a tablet, and a desktop. Read it as a first-time visitor would. Ask whether it makes the content easier or harder to consume. That honest five-minute check will catch 90% of template problems before they ever reach a reader.
What does your current post template look like, and which method are you planning to try? Drop your setup or your question in the comments below.